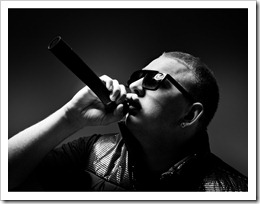
One Light, Three Portrait Styles
 Earlier in the year I had the chance to spend a day at the Hasselblad studios in London. I got some hands on time with their top of the range H4D-50 camera and shoot some photos. I also squeezed in some time to record a couple of videos. The first was on getting the perfect white background and this video is all about getting three looks from just one light.
When I first started studio lighting I made the classic mistake of buying four lights, opening all the boxes and setting all of them up at once. It was roughly at that point I realised that lighting was clearly much harder then I had first thought. There were lights pointing everywhere and despite several attempts, getting any sort of balance to the light was just to much for me to figure out.
So that’s why now, when I’m training photographers in studio lighting, I always start with just one light. From experience I’ve found that one light works wonders for learning the essentials of studio lighting and as you’ll see in the video below, there’s still plenty of creative options to be had.
If you’d like to learn more about studio lighting I run one to one (or small group) training sessions at my studio in West Sussex.


Another great video. Thanks Gavin! I learned quite a bit. I’ve done the same before with setting up every light thinking “that’s how it’s done by pros” only to find myself in a bad lighting situation.
Lighting is a tricky world, I actually wouldn’t mind learning a bit more from you on that topic.
Thanks again.
Great video – likewise I started off using both of my lights and flash for a shoot recently but was got better results with just one. In future, I will start with one and then build up if required rather than starting off with all the lights I have.
Loving the video, really handy for me…looking to buy a set of lights so will be in touch soon for some training….nice camera, and wouldn’t mind those Broncolor lights…..a shame I can’t stretch to them at the moment.
Never really knew what a meter reader was. Thank you for explaining it simply 🙂
In your first set up, a white cyc wall, over head lighting and it renders a grey background. Is that due to shadows or was this post edited?
Another fine tutorial thanks Gavin.
David, if no direct illumination is on a white background it will always come out grey. In fact it’s possible to get a black background using a white if there is enough separation of subject and no ambient falls on the background. Grey – its the “new white”. I’m sure Gavin touces on this in another one of his fine tutorials – maybe search his YouTube stuff for that.
Great video, easy to understand.
Simple lighting and simple backgrounds are so effective in creative dramatic results in portrait photography.
Great tips!
Its really awesome to learn about the lighting while shooting and giving an entire different styles to an image is fantastic.
Hope for more learning from this blog.
Thanks.
Your way of explanation is remarkable and I easily understood the depth of the lighting while shoot.
It helps me alot for my next product shoot.
Your teaching is AMAZING! I wish I was close enough to attend your classes and workshops. You make it so easy to understand so quickly! Do you offer anymore lessons from far away?? 🙂
Great video
Really great video as always. Just one question though. Where is the flash coming from? And isn’t it technically two lights? Flash and soft box. Also what lighting is in the studio? Certain type of bulb color or/and temp?
Thank you
Hi! This is my first time visit the site. Before tht i had watched the photography tutorial in youtube. I want to say, thank you very much for many tutorial that simlpy and easy to understand. 😀