Building a Photoshop Power PC – Part 2
 A few weeks ago I wrote Building a Photoshop Power PC – Part 1 in which I went through the rather enjoyable process of choosing components for my power PC. I used a couple of different companies to supply the parts for my PC which saved me money but cost me a bit of time as everything didn’t arrive together.
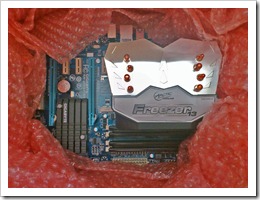
The last thing to arrive was the most vital. I ordered my CPU, Motherboard and RAM as a complete bundle. The advantage of a bundle was it’s made to order, overclocked to increase speed and tested before being dispatched. It arrived heavily wrapped in bubble wrap, which is always good to see and was ready to install and use.
Before launching myself into the unknown of my first ever build I armed myself with a little knowledge courtesy of an excellent how to build a PC video from new egg. It’s a long one, but packed full of useful build tips.
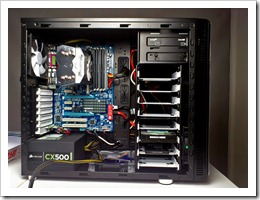
 Despite my lack of experience at PC building, I completed the build without any problems in around 3 hours. The real star of the build was the Fractal R3 case which turned out to be a real boon when it came to keeping the masses of cables tidy. The R3 case has a 2 cm gap between the case and the back panel. It may not sound much, but it’s just wide enough to hide cables and keeping cables out of the case gives better airflow, which in turn means a cooler PC.
So there you have it, a shiny new PC is built. Unfortunately building the PC isn’t the end of the story. There’s the small matter of installing an operating system, adding all the software I need to do my work and moving my files from my old PC to the new.
That’s what I cover in Building a Photoshop Power PC – Part 3 (coming soon)


love it gav..im a big pc gamer and photographer. i also like building pc’s and im liking your build.my pc is also neat and tidy with the cables hidden away.keep it up gav i always look forward to your posts
Glad to see it Gavin, there is a certain element of pleasure when you build you own from the research up to a finished fast purpose built workstation.
Good luck with the next stage
Pete
P.S Thanks for all the info and tips you put out, loving your tutorials and videos
Great effort and result. I suggest using Acronis True Image to clone your old drive onto the new one. It’s totally hassle free.
Well done, Gavin ! Building a PC, even if it is only once, should be on every man’s bucket list. 🙂
Congratulations Gav! Once you have the OS installed and “essential” programs installed and configured, you might want to image (Acronis) your C drive (SSD). That way should the SSD die ( those things can be dodgy) or get a virus/spyware etc, you can always return to your “virgin” computer state by utilizing your original image. Enjoy!
Actually this is a good point. Since you’re running the OS from the SSD you could point your documents/downloads/desktop etc folders to another partition. The benefit of this comes when you need to reinstall the OS – no backing up or data migration required as the data is already on another separate partition. If you also use a program such as DeepFreeze, every time you restart the computer the OS reverts to it’s frozen state – thereby completely eliminating any possible virus problems. You could even delete your Windows directory, turn the machine off and it’s back again. The drawback is remembering that once “frozen” any changes made to the OS partition are lost so you need to “unfreeze”, reboot, make changes such as install software/plugin etc, “freeze” and reboot again. It’s a very handy way of protecting systems that *have* to work with no downtime.