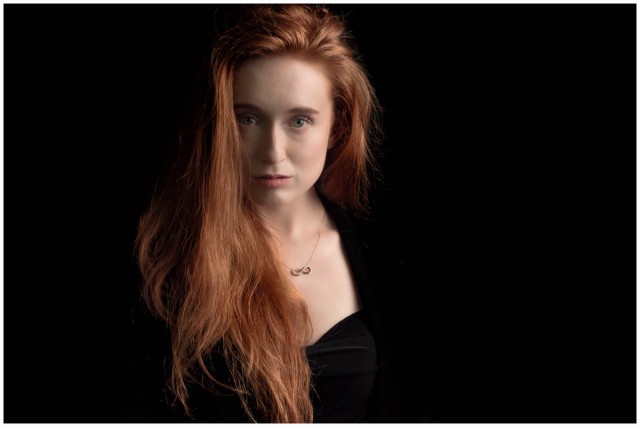
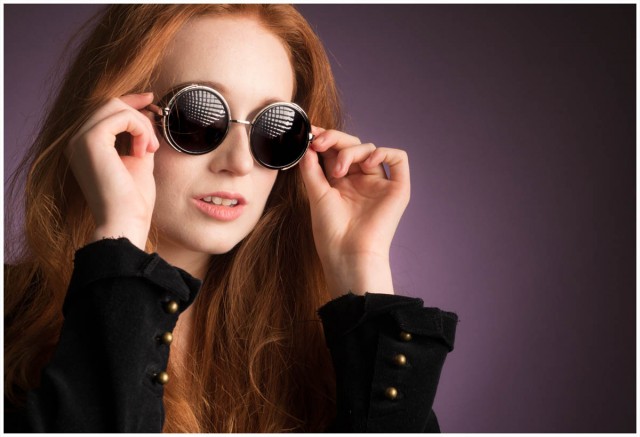
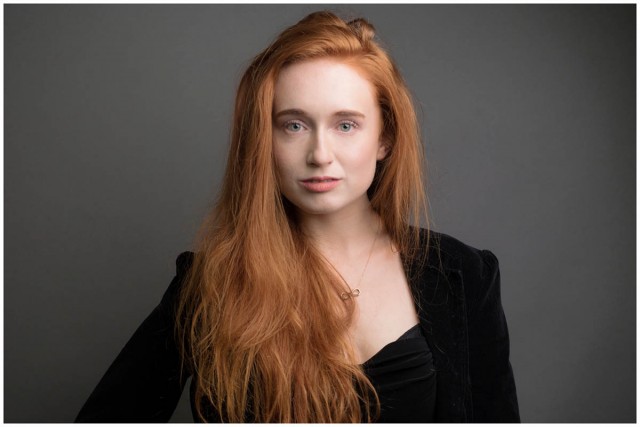
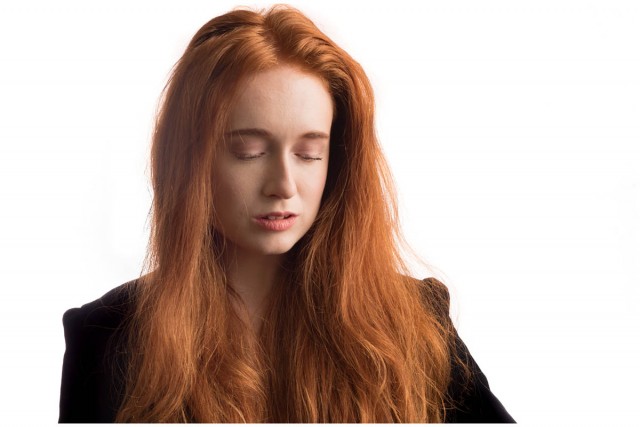
Four looks, one grey background
Sometime back I made a textured wall for my studio which I love but the most important thing about it is the colour. If you can only choose one background for your small studio then for me it’s always going to be grey. Why? Because with a little bit of lateral thinking and lighting knowhow a grey background can be black, white, coloured or grey (obviously).
Grey
This is the easiest to do. If you only have one light get your model as close to the grey background and shoot away. If you want a darker grey simply move the model and the light away from the background. For a lighter grey you’ll need at least one more light. Scroll down to “white” for more info.
Black
Black is basically a very dark tone of grey so to make the standard grey go black you can do one of two things. Either move the model or light as far from the background as possible or move the light as close to the model as possible. An egg crate grid over the light can be used to reduce light spilling onto the background.
In a small studio the latter way is how I go, it does mean that the softbox ends up in the shot but if you watch the video you’ll see my Photoshop / Lightroom trick to hide it.

Coloured
For this you’ll need at least one more light. The extra light(s) is placed behind the model and a coloured gel is fitted. The background colour is from the gel but also from the light output. A stronger background light will give brighter colours which can bounce off the background and onto the edges of your model in a small studio. A lower powered light will created a background with darker, richer colours. It’s all about balance and experimentation.

White
This is the toughest to nail. Adding more light onto the background from the rear light makes the background record as a lighter tone of grey. Add enough light and the grey will be white. Add too much light onto the background and you’ll lose detail on the model. You can find out my tips for balancing light to get the perfect white background in this video.


Excellent Gavin, love it!
Guess who’s just bought a grey background?
Looking forward to the ‘props’ video.
Great lecture! It takes training for sure but you really makes one going for it.
Excellent tutorial, as usual. Timely too as I will use these techniques at an upcoming portrait session.
Excellent
Can you let me know which Flash stand are you using and are you using speed lights
Cheers
Rahul
It’s a stand from Linco http://www.adorama.com/LI8308.html
Hi Gavin i see your shooting with the Em5 mark ii, any particular reason why you use this camera over the EM1 mark ii?
I’ve used the E-M1 Mark ii and it’s amazing! It’s also proving very popular and I’m sure I’ll be upgrading my E-M5 Mark ii before to long.