Photo Realistic HDR
 Over the past couple of years the letters HDR have become synonymous with heavily processed images, garish colours and unreal contrast. Don’t get me wrong, when done with skill that kind of processing can look amazing… on the right subject. The trouble is, of course, that it’s very easy to get carried away with the effect and go too far.
As a result many photographers now hear HDR and instantly dismiss it as gimmicky when in fact HDR (High Dynamic Range) is a technique that’s as old as photography itself. Dodging and burning in the darkroom, pulling out the highlight and shadow detail in RAW processing are all forms of HDR.
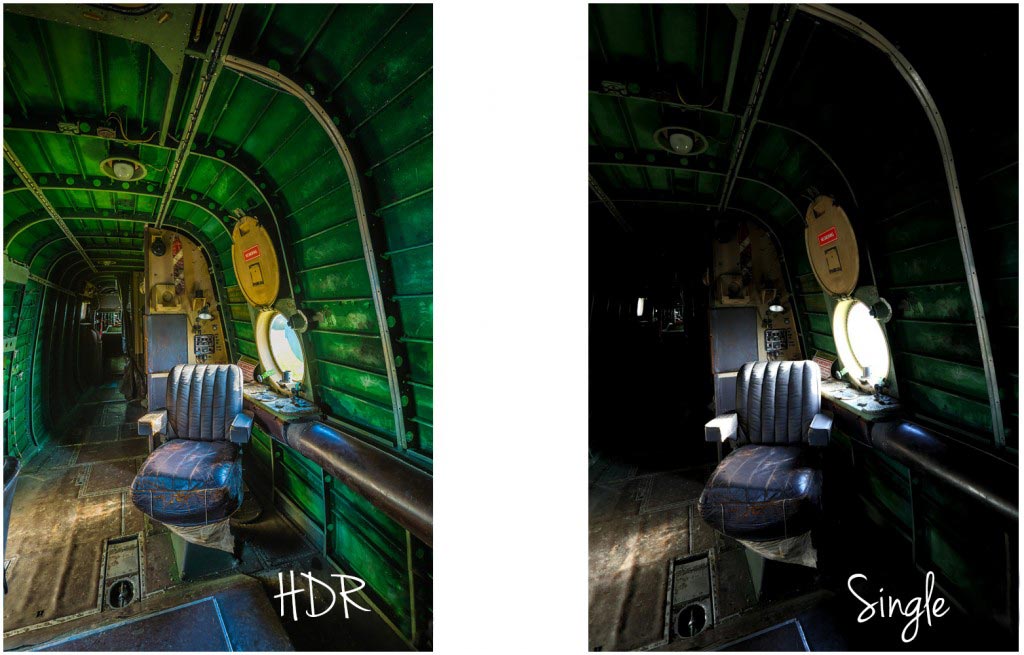
However, there are plenty of times when a single image doesn’t have all the detail you want in the highlights and shadows, no matter how much processing you do to it. That’s when multi photo HDR’s come in to their own.
In the video below I’ll show you a couple of ways to shoot multi image HDR photos and then I’ll skip over to Photoshop CS6 to make a photo real HDR image. Photo real means my goal is to make the photo look like a photo… not a painting.
If you can’t see the video click here
It’s worth pointing out that you must have Photoshop CS6 and have updated its RAW processor to at least 7.1. An alternative work flow would be Photoshop CS4 or CS5 and Lightroom 4
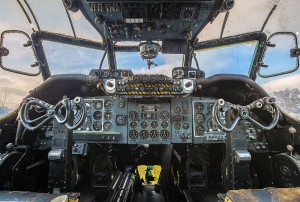
The bigger the difference between the lightest and darkest part of you scene the more photos you’ll need to take. Often three photos are enough to make a good HDR, such as in the image below but it’s always better to have more photos even if you don’t end up using them.
Gear used in this video:
Canon 5D Mark 3 http://www.adorama.com/ICA5DM3.html?KBID=67338
Canon 16-35mm f/2.8 Mk2 http://www.adoramacom/CA2470.html?KBID=67338
Adobe Photoshop CS6 http://www.adorama.com/ABPSCS6M.html?KBID=67338
Manfrotto 055 Pro Tripod http://www.adorama.com/BG055XPROB.html?KBID=67338
Canon RS-80N3 cable release http://www.adorama.com/CARS80N3.html?KBID=67338
Many thanks to the Gatwick Avaiation Museum for allowing me to film in their Shackleton aircraft.
http://www.gatwick-aviation-museum.co.uk


Loving the new site Gavin keep the post coming.
Great New site. Best way to start the New Year 🙂
Thanks for the excellent video Gavin.
Liking the new look site too
Liking the new site Gavin. Added the link to my favorites quick access bar already.
A great refresh to your site, Gavin. Looks much more modern and sophisticated. Easy to navigate and works well on mobile.
Thanks for sharing Gavin! And congrat for your new website.
Just to say I’m a french photographer and your video are wonderful even for people whose english is bad!
Great video to follow.
However on saving the 32 bit file as a tiff, then enabling all tiff files to be read in the camera raw preferences. I still cannot open this file through camera raw, but opens it straight away in photoshop.
What do I need to do to correct this?
thanks
Simon
Hi Gavin,
Love your work.
I pretty much only shoot candid photography in a Superflat picture style which increases the dynamic range of a single shot substantially. This has allowed me to not be so afraid of the sun or midday back lighting (helps as there’re lots of suny days in Australia). I learned about superflat from people who use the 5D for video.
It does mean that you pretty much always have to post process in RAW and I must admit it works much better with the new 2012 Camera RAW settings (which allow you to do similar things with the photo as you would with Da Vinci Resolve).
Have you had much experience with this? I don’t see photographers talking about it much for their work, just videographers.
Kenneth
Sounds a bit like the zone system from my days in black and white.
Great tutorial Gavin.
How can I save this 32bit HDR photo as a jpg please? It’s only letting me Dave it as a tiff. When I change the mode to 8 bit the photo goes horrible looking.
Please could you advise, really appreciate it if you could. 🙂
Even though your blog is old, its contains valuable informarion on HDR photography.
Hope you write some new artciles!