SplashArt Kit 2 ~ Review
I love photographing drips and over the years I’ve made one or two videos about how it’s done. However the SplashArt kit 2 offers to take drip photography to a professional level.
|
|||||||||||||||||||||||||||||
Getting good photos of water drips isn’t that hard to do, in fact one of my most watched videos covers how to get great photos of basic drips. However the one thing I’ve always wanted to capture is a collision and always failed to do so. The SplashArt kit promises to do exactly that with precise control.
 What’s in the kit
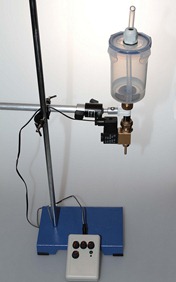
The good news is the kit contains everything you need, all you need to do is add water and a camera of course. The heart of the splashArt kit is the controller which is used to trigger the camera and release the drips. The other vital part of the kit is the solenoid which is basically an electronic tap but you also get all the cables you need including the trigger cable that’s compatible with your camera model.
If you’re a UK buyer you can also buy the kit with a metal retort stand and arm. The retort stand took me straight back to my days in the chemistry lab at school and the arm does look like something out of a plumbers merchants but it works perfectly.
In use
Setting up the SplashArt kit was very simple with some nice touches. For example there are three cables to be connected but each cable has a different connector, so there’s no chance of accidently wiring your camera to the mains!
 My only complaint is that none of the four dials on the controller are labelled or have scale markings. That made getting up to speed with the unit a little more tricky for the first time user like me.
Of course the big question is how did it perform? Well, after an initially frustrating 10 minutes of missing the magic collision I managed to find the perfect combination of settings for the dials and I was off.
20 minutes later I had dozens and dozens of amazing collision shots in the bag.
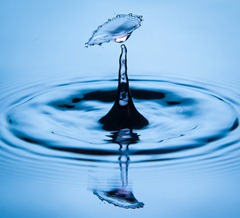
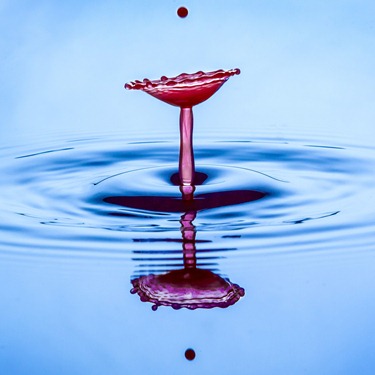
Part of the allure of a kit like this is the predictability of the system and the SplashArt kit excelled here. Take a look at the six photos below. They were taken one after the other and although each is different the timing was perfect shot after shot. Just don’t change anything once you have the look you want!
Who’s it for
At nearly £180 this kit is great value but it’s not for everyone. You’ll need to be fairly serious about your splash photography in order to warrant the money. Moreover, once you’ve mastered the art of capturing splash collisions you’ll need to be resourceful in the creativity department to come up with more uses.
That said there are plenty of alternatives for you to explore. Water can be replaced with milk, paint or any coloured liquid you can get your hands on. Each has it’s own style of splash.
 I can imagine the SlashArt kit would be a brilliant investment for a small group of photographers who can share the skills and the price amongst themselves.
Conclusion
I loved using the SplashArt 2 kit and it’s a keeper for me. At £180 it’s not cheap but it’s hardly expensive either. OK so there’s no markings on the dials and from time to time it would miss a drop but in the space of 30 minutes I went from never having captured a splash collision to having dozens of them… and they were all brilliant!


Great review. I would love one, but with delivery to Ireland cannot justify the price.
A DIY kit will have to do the job for now. Loving your website Gavin, thanks for all the video’s and reviews!
Roisin, Ireland.
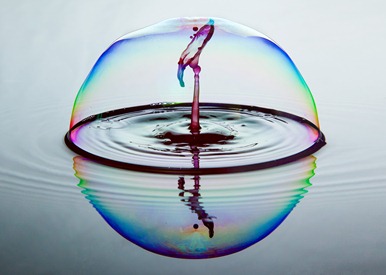
Thanks Gavin for the review. Is the last photo that looks like the splash has been caught in a bubble straight out of the camera. Or have you used photoshop to create it.
All the photos, including the bubble are from the camera. No Photoshop tricks were needed 🙂
Could you pass on some info about how you got the bubble please
Drops in a bubble are fun to make. I use the regular bubble-blowing liquid for these; dish
detergent diluted with water will also work. Add a few drops of glycerine to strengthen the
bubble mixture. Simply blow a bubble on to the surface of the water. Check your drop
zone and either gently blow the bubble to that area or move it with the bubble wand.
Hello matey
I’ve been following you using this since you got it. Why? Because you were genuinely excited by it.
It’s certainly excited the splash fans and very probably introduced a few others to the art (including me no doubt)
Good job
Will
Great review Gavin.
First noticed you got this a while ago on twitter, and after following your updates and checking out the suppliers website this item is on the top of my Christmas list.
Just hope Santa can set up the dials for me too.
As always, great job and keep up the good work.
Brian.
Hi Gavin, Thanks for the great review! Will you be doing a video on the kit?
Keep up the great work!
Hi Gavin,
Thank you for the great review.
Can you explain a little more on the SplashArt Controller set up?
I understand there are 2 outputs from the controller, one to the Solenoid and the other to the camera.
My question is, where does the flash come in? How do I set up a single flash [or] a duo-flash setup to sync with the droplet?
Appreciat your respond.
Hi, I live in the USA; where can I purchase a SplashArt Kit?
I have one of these kits and I love it. I have taken tons of shots like the six in a row you have up on this sit. What I’m trying to do is have the second drop make a dome or umbrella shape over the first drop. Will straight water work or is some gel add to the water to help. What kind of distance are you using from the tip of the nozzle to water, I have about 17″. I use two lights SB-900 and a SB-800. Any pointers would be great.
I got my kit and got some collisions very soon after setting it up. I am, however, having a hard time getting them consistently and I am fighting with not enough light and motion blur. Anyone have some good suggestions for a NEWB?
SOunds like your shutter speed or ISO are wrong. Low ISO and a flash sync shutter speed are what’s needed. For consistancy you need to have the mirror lock up in use. STick at it, the results are worth it 🙂
Are you going to make a video using this splash art kit? I’m really interested in buying one, But like most people am a little sceptical that I will have to purchase extras to get the most out of it!
so I guess I’m pleading with you.
you could make a 15 minute challenge out of it .
love your work.
The flash holders which mount on the stands, look great! Where can we find these flash holders?
Do you know if this kit is available in the USA? Will it work with my Olympus OM-D E-M5 Mark II?
im in oregon and i bought one. you need to be able to hook a cord to the camera. do you have ports?
I think you can get cables for pretty much every camera but at a pinch you can still trigger the drips / collisions and manually fire the flash. It’s all about timing 😉
Hi Gavin,
Thank you for this review. Were you using just straight water in the machine and in the bowl underneath? I have been able to get similar “umbrellas” with just colored water. Have you tried any other liquids? I want to get the longer, thin tower but can not find anywhere that will tell me what to use. Thanks.
I’ve stuck to water and coloured water only
I have tried Splash Art and Cognisys Stop Shot, yours is far better for me,
I live in Pennsylvania USA. I purchased Splash Art this year, have gotten some
great pictures. the problem is when I push the release button, water drops every time
but the camera only fires every other time. All ways the same. Any advice would be
greatly appreciated. Canon 7D mk II, canon speedlite 430EX II.
Thanks