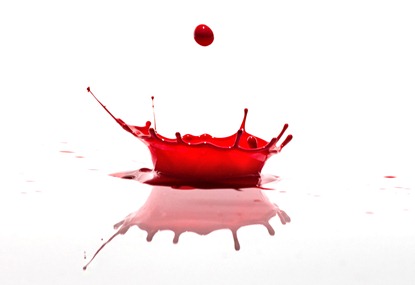
Paint Splash Photography
I’ve photographed water drops on many occasions and I’m always amazed by the stunning images that something as hum drum as a drip of water can create. The only problem with water is it’s transparent nature. That’s fine if you want a dark background but a real problem if you’re after a white background.
 For a white background you’ll need an opaque liquid to photograph and after a bit of trial and error I found the best thing to use was paint.
If you fancy having a go yourself, there’s a couple of extra tips I can pass on as well as the video below.
Water and paint
The paint I used was a ready mixed water based paint that’s made for children. That’s important as it really does go everywhere, fortunately water based paints can be cleaned up with a damp cloth even when its dried. I also watered the paint down a lot. It was roughly 10 parts water to one part paint. That created big splashes but maintained the all important opaque property of the liquid.
Burst Mode
I used the camera’s pop up flash to trigger the main flash. It worked well but I had to wait for the pop up to recycle before I could take the next shot. However if you have a set of Pocket Wizard radio triggers (or any other make for that matter) then you can shoot in continuous shooting or burst mode making bagging the perfect splash much MUCH easier.
Here’s a list of the equipment I used in the video.
Canon 60D
Canon 70-300m USM
Light stand + Boom Arm
Canon 580 EX II Flash
Flash bracket
Canon Remote Switch
Manfrotto 190 pro Tripod
Adobe Photoshop CS6


So, that is how you do it! Thank you for the tips!
By the way, the quality that makes paint opaque, a result of the stress on the molecules by the splash, is called ‘viscosity’. Yeah, I’m a nerd! LOL My father was a paint specialist. He taught me some of that stuff.
Again, thank you!
Su
Hi Gavin,
What advice would you give to make the background pure white for those of use using and older version of adobe camera raw (cs5 and below).
Thank you in advance
Adam
A similar effect can be achived by using a Levels Adjustment Layer and pulling in the white point slider.
Hi Gavin.
Just wanted to thank you for this terrific tutorial and all the other tutorials you have here, I have learned so much from them and they are always straight to the point and very easy to follow…I’m a big fan!
Best regards Ricky.
Milk and food colouring works great as an alternative!