Lightroom Preset – Soft Sepia Portrait
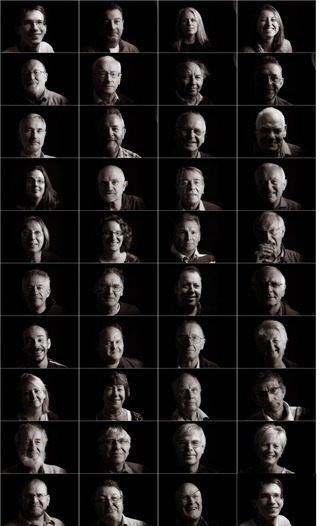
 As part of my talk to the digital Imaging group of the Royal Photographic Society last Sunday I set myself a mini challenge to photograph as many of the attendees as possible during the lunch break. It was a brilliant idea only marred by the fact I hadn’t anticipated that most people would be eating out.
None the less I managed to shoot around 40 portraits in under 30 minutes. That’s not bad but was less then half the audience.
The easy bit was processing the photos which, thanks to the power of Lightroom 4, I was able to do in just a few clicks.
Using Lightrooms sync option I demonstrated just how simple it is to apply the same effect on dozens of photos in one click.
If you fancy trying my Lightroom 4 settings then you can download my Soft Sepia Portrait from here:
www.gavtrain.com/free/soft-sepia-portrait.zip
It works best on a dark or black background.
Click to enlarge image
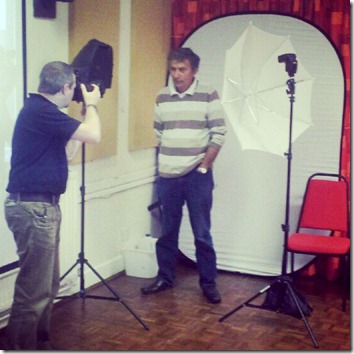
And if you’d like an idea of the lighting set up it was as my super simple single speedlight set up. You can get a fair idea of how it works by looking at this behind the scenes snap. The only difference is the white background was flipped over so I could use the black background.

Photo by Will www.willgenix.com


Hi Gavin: The preset is really lovely. Tried it on a dark background portrait and thought it turned out quite well. Here it is if you want to take a look:
https://creative.adobe.com/share/8f81cc83-1c65-44b6-802e-8f8221727e5f
I’m going to sound stupid here, but in the speed light setup photo, what is on the stand on your left?
Great photo Julie 🙂
Not a silly question… The black thing sitting on the stand on the left is one of the speakers from my PA system.
Really enjoyed the day on Sunday! Sorry this email is not related to this article but I don’t know how else to contact you. I got your two DVDs on Sunday, but so far have not been able to find the ‘Goodies’ on them that you made reference to in the ‘borders’ item. Would appreciate some info if you can find time please.Thanks Sheila
There’s no goodies folder but everything you need (including the border action) is in the Start Images folder.
Hi Gavin! Awesome portrait! I took a few self portraits and I got a great idea from your collage! Love itt! A question off topic but please help me!: I’m taking a photography course in Highschool and this weeks project is “Masks and Dolls” inspired by Ralph Meatyard’s photography. I need help!! I want to win the scholastic gold key award. Can you please give me some ideas? I am going to use Nikon D3000 and I cant use flash. I am also going to be using creepy masks and dolls to add drama! Can you please give me some ideas? Thank you for the knowledge!
Hi Gavin,
How did you arrange your photos together in the example above? Looks like a contact sheet. Thanks for everything you do for us! Keep those videos coming. Any chance you are coming to the New Jersey/New York area?
thanks,
Carlos
Gavin,
I’m looking at recreating something like this for work colleagues and the theme “Movember”… Can you advise on your camera and flash settings you used
Thanks! Andy
Hi Gavin,
not related to portraits but I was wondering how you laid out the portrait pics in to one image. I have 215 images I would like to print onto a large poster but dont want to do it manually and I dont want to do a photo mosaic.
Sorry if my question is in the wrong place,
Daniel.
I used Contact Sheet II which is once again part of Photoshop in CS6.
it is showing that”it is not the right kind document”
Great preset thanks for the opportunity to try it.
I downloaded this preset but can´t get it to work! How can I do?