Winters Walk
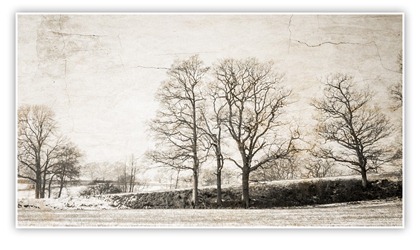 It doesn’t happen very often but sometimes I know exactly how I want a photograph to look even before I’ve pressed the shutter, which is exactly what happened with this photo. I took the photo of the trees as part of one of my one to one training courses. I was out with David, who is a great technical photographer but was looking for help with “seeing the photos”.
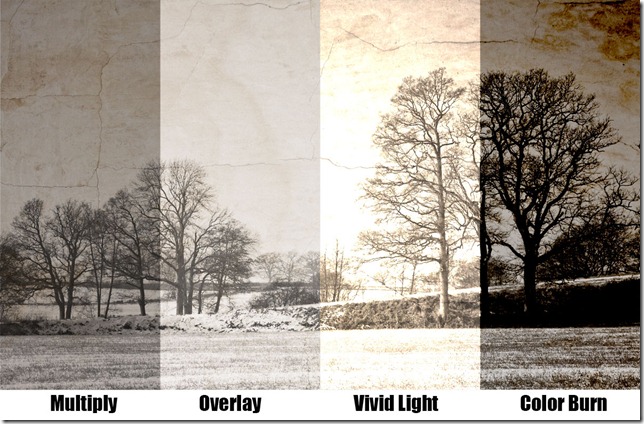
To be honest I’m not totally sure David believed me when I said could visualise the final image, especially as the original image of the trees wasn’t blessed with much excitement. I mean there was no foreground interest, no lead in lines and the lighting wasn’t that interesting either. But it was the sky that caught my eye. A blank sky is an ideal candidate for a spot of texture blending and I have a whole folder full of texture images just waiting to find the perfect partner.


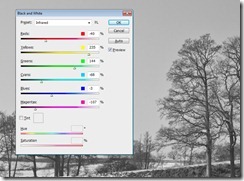
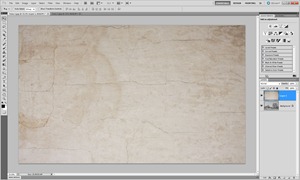
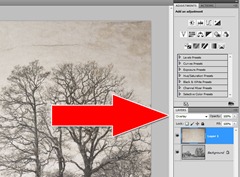


Interesting! A very simple technique to enhance an otherwise dull photo. I downloaded your pack of textures a long while ago and actually used one today, but not for a photo (I was doing some graphic design and used one to add a weathered effect). I try to use textures as little as possible, but if the situation really seems appropriate, I dive into my Hoey folder of textures. You’re a great resource for all things photography!
I love a good texture too every now & then. Just remember those textures are “Free for personal use” only
I think the best way to avoid a “this is for personal use only” email from the owner’s lawyers is to simply take one day to harvest with your camera a Texture Library by simply visiting different locations and photograph the textures that catches your eye… simple solution and very cool by the way.
You not only control your library but have fun doing it too!!!!
I often find that Multiply is the best – but sometimes it darkens an image too much, so cutting back the opacity to ‘just’ the right point does the trick.
Other times I duplicate the base layer and perhaps use ‘Screen’ mode to lighten it and then cut that back in places with a layer mask.
Nice one Gavin,
Worked a treat for a shot I took this week of Ely Cathedral…
Dont know if a link will work but here goes if you’d care for a look…
http://flic.kr/p/bs7yqX
Thanks for the tip Gavin, excellent like all your work!
Bob
Thanks Gav, I had many shots taken in Rome where it snowed after 26 year, many with gray sky. Now I know how to use them in a nice way.
… and where do I find that ‘pack of textures’?
Wonderfully seen Gavin love the tutorial simple yet effective
I loved this when I first saw your post of it and now I see how you did it… Thanks… And to second Lasse… Where would we obtain the textures?